Pages

KLR 650 SW-Motech Crash Bars Install

The name "crash bars" does not bring good things, but "plastic replacement prevention bars," probably sounds worse. But, protecting the plastic is usually why we install these bars. Besides, in the back of your mind you know that one day soon you will be glad you have them.

Several brands and styles of bars are available for the KLR, but I like SW-Motech bars. They look good, are solid on the bike, and have saved my engine shrouds a couple of times. These bars may seem expensive, until you spend $200 for a replacement Gen 2 engine shroud. Drop the bike twice and the bars have paid for themselves.


Here are some highlights of SW-Motechs going on to a 2012 KLR:


Unprotected riding is risky behavior.
In my experience, every set of SW-Motech bars arrive in a crushed box. Fear not, the bars are covered in bubble wrap and can survive abusive shipping. You receive two of the bars pictured below; one for the left and one for the right, a plastic bag of hardware, and detailed installation instructions written in German. Your inability to read German will not be a problem. There are plenty of pictures and installing the bars is not really rocket science anyway.


Crash bars are just what is needed.
The bars mount at three locations: 
1- the front frame/motor mount (left side of the picture above), 
2- the subframe (upper right hand), and 
3- at the foot pegs (bottom of the picture). 

Study the installation instructions, then sort and familiarize yourself with the hardware before tearing the bike apart. Dump the hardware in a box or bin to keep everything together and sort out what is needed for each mounting location. Now, you are ready to start on the bike.
   
Remove the bike's side panels, seat, and gas tank. Keep in mind that an empty gas tank is easier to handle. Once the bike is stripped down, you are ready to start mounting the bars. I recommend starting with the right side. 


The rubber bushings go here.
The inserts go inside the bushings.
When installing the bars, leave the mounting bolts loose until they are started at all three mounting locations and use thread lock on all of the bolts. I begin with the right side sub-frame mount. This mounting point will hold the bar in place and help in lining up the other two mounts. Be careful and support the bike to prevent the frame from shifting while the sub-frame bolt is out.


A hex bolt replaces the stock bolt on the sub-frame. 
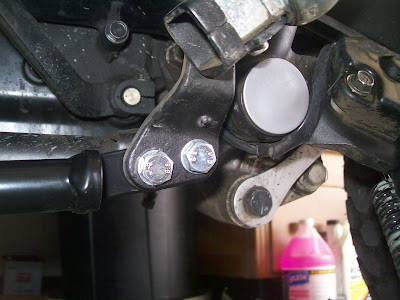
Right side foot peg mount bolts.
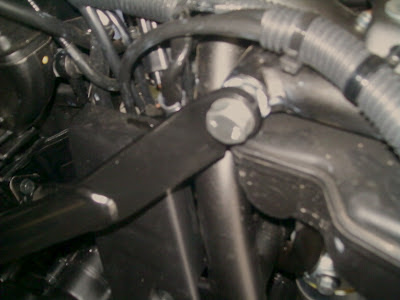
After all of the right side bolts are started, move over to the left side and repeat the process: sub-frame, foot peg, and front frame. The front bolts can be difficult since they pass through the right side bar, the frame, and the left side bar. The washers sandwiched between them add to the challenge. This is the only mounting point where both the right and left bars are secured together.


Left side of front mount. The right bar is already on. 
Once both the right and left bars are loosely mounted, go back and tighten everything down. Be careful not to over torque any of these bolts. When all six mount locations are tight, you are ready to reassemble the bike. If you drained the fuel tank, don't forget to add gas before taking off to test your new bars. 
The right side bar installed
 The left side bar installed

Adventure ready on the street or trail.
You can install these bars without a helper. But, someone to hold things and to hand you tools and hardware is a big help. The job is not technically difficult and does not require any special tools. It does require patience to align all of the bar mounts with the bike. Take your time and BE CAREFUL that you do not cross-thread any of the hardware. When you have finished, it is time to ride and enjoy the look and the peace of mind they bring.

KLR650 16t Drive Sprocket Install

Swapping the KLR stock drive gear for a 16t drive sprocket is an easy, and inexpensive upgrade that improves the bike in a couple of areas. The larger gear boosts speed and lowers engine RPM for reduced vibration and a noticeably smoother ride. On the road, it feels like you have an added gear and it really shows when running at highway speed. The down side is a slight loss of torque on the low end. But, most riders agree the benefits far outweigh this slight loss.


This post is a photographic overview of changing this gear on a 2012 KLR. This is not a step-by-step guide and you should follow the manufacturer's instructions for this procedure.


I pencil mark the axle position on the swing arm as a reference for positioning the axle when putting things together again. These marks are only a reference since the larger 16t gear will position the axle slightly ahead of it's original position when the chain is tightened at the end of job.


Above: I have already removed the cover from the stock gear. that's easy. But, removing the nut on the old gear can be difficult. Have someone hold the bike steady with the brakes applied to prevent a tip over while wrenching on this nut. This impact wrench did not work and I finally used a breaker bar with a length of pipe slid over the handle for extra leverage. An 8 sided socket is a good idea to reduce the chance of the socket slipping off of the nut and possibly rounding the corners.


This is the stock 15t gear with the nut and washer removed. The chain is already loosened and the gear is ready to come off. Notice the bright, clean, yellow wires to the left of the gear. Be careful not to damage these wire when removing the gear. 


Have a gear puller handy in case the old gear is stubborn about coming off the shaft. This is also a good time to clean the black, greasy, funk out of this area and inspect those wires for worn or damaged insulation. 


Yes, size matters! The above pic shows the size difference between the 16t gear on the left and the stock 15t gear on the right. That extra tooth will give your KLR a real boost on the highway. 


Wrap the chain over the new gear before sliding it on to the drive shaft and remember to becareful with those wires in front of the gear. I like to wear rubber gloves on these dirty jobs, to keep my hands from looking dirty and greasy over the following few days.


The new gear and new torsion nut are both installed. I recommend you tighten that nut to the specified torque. Also, be sure your torque wrench works properly. Also, notice the chain is a bit closer to those wires now.


Take your time when tightening the chain and ensure the axle is straight. DO NOT trust the factory reference marks engraved on the swing arm. One method is to measure from a fixed point on both sides of the bike to the axle on each side. Both measurements must be equal. When adjusting the chain slack, have someone sitting on the bike. The chain tightens with a rider on the seat. Remember to torque the axle nut on the right-hand side of the bike and install a new cotter pin; then install the cover over the drive sprocket. 

Finally, throw those nasty gloves in the trash and take her for a spin. You may notice a slight loss of "zip" when taking off from a stop sign. But, you will soon forget that when you reach 55-60mph and find you have another gear to shift up. Have fun!

New KLR Thermo-Bob Install and Wiring Issues

Before, doing the Thermo Bob mod, I did my homework and decided it was needed. All engines are designed to operate at a specific temperature and running below that temperature causes additional wear. I wanted my KLR to reach operating temp as quickly as possible so I installed the Thermo Bob.

Thermo-Bob is a thermostat installed in the KLR's upper radiator hose. It connects to a second fitting installed in the lower radiator hose. When the engine is cold, Thermo-Bob routes engine coolant around the radiator allowing the engine to quickly reach operating temperature. When the engine warms up, Thermo-Bob routes coolant to the radiator to prevent overheating.

This cycle repeats to maintain a near constant 185 degree operating temperature at the lower end of the cylinder. Proper operating temperature reduces engine wear and allows for smoother shifting. For more details on Thermo-Bob, visit shop.watt-man.com.  They are great people to work with and I highly recommend them.


Thermo-Bob installed in the upper radiator hose.

Fitting in lower radiator hose

Lower fitting with bypass hose on upper left

Chaffing wire bundle near horn.

The installation was very simple and straight forward using the instructions printed from the internet. This was my first time removing the gas tank and fairings so that probably took longer than installing the Thermo-Bob. While I had everything apart, I took several pictures of the bike stripped "naked", she looked a lot different.

Two mistakes that you will want to avoid when you Thermo-Bob your KLR. First, run the gas tank to almost empty. My tank was half full which made that monster even more awkward during removal and installation. Second, don't forget to reinstall the coolant drain plug before refilling the cooling system. That oversight on my part created a small mess on the garage floor. But, I had kitty litter on hand to clean it up so it was not really a big deal.

It was nearly dark by the time I finished, but I had to take her out for a ride. It was a cool evening, 51 degrees, but the temp needle stayed solidly in the mid range during the test ride. Two improvements that other guys had noticed from this mod was smoother shifting and better acceleration. I noticed both of these right away and was very happy with how the bike performed.

Overall, the Thermo-Bob mod is easy and well worth the time and trouble. I would recommend this to every KLR rider who is interested in longer engine life without burning oil. The smoother shifts and zippy take offs are also nice. Better gas mileage is another expected benefit, but I have not ridden enough yet to know.

Sandwich Accident and Near Miss With Jerry Garcia Clone

The pic is a little rough, I only had my cell phone.
This morning I caught this picture on my cell phone just seconds after the accident at a busy intersection. I had planned to be on that side of the intersection, but a car had cut me off while approaching the light. I cut through a parking lot to avoid traffic and came out of the parking lot to see this pickup-car-van sandwich. The pickup on the left side of the sandwich is exactly where I had intended to go!!

While traffic was stopped for this accident, Jerry Garcia (from the Grateful Dead) almost ran over me. Jerry was fixated and staring at the accident while creeping over into my lane from behind. I beeped the horn and Jerry saw me just in time to stop. 
http://www.biography.com/people/jerry-garcia-9306297
I have never been a Dead-Head, but I have nothing against Jerry's music or his fans. In fact, I think Touch of Grey is a pretty good song. So, I am at a loss to explain why he came back from the grave to nearly run me down. But after that, I got out of there fast, before I ended up in someone else's picture. 

It is one crazy world out there - Be careful!! 

The World's Fastest KLR

One of the Worlds Fastest KLRs
http://motorcyclesuspensionblog.com
KLRs have circled the globe, crossed rivers and mountain ranges - why not set a few speed records, as well?  The World's Fastest KLR is just the kind of nutty idea that I can't resist. The idea began with the movie "The World's Fastest Indian" (which I highly recommend) and led to the question of how fast can a KLR go? 

The Old and Slow Racing team have clocked some impressive speeds while running NOS but, how far can you modify the bike before it is not really a KLR anymore? That's a question best left for discussion around the campfire during your next overnight ride. 

Till then, here is the link to their "Worlds' Fastest..." website.  http://www.worldsfastestklr.com/  to get you "up to speed."