Those stock KLR foot pegs work fine for most riding, but can turn slick in water and mud. Standing on slippery pegs adds an extra challenge to handling the KLR on a rough and rutted trail. I did not need that additional challenge and tried a set of
SW-Motech On-Road/Off-Road pegs.
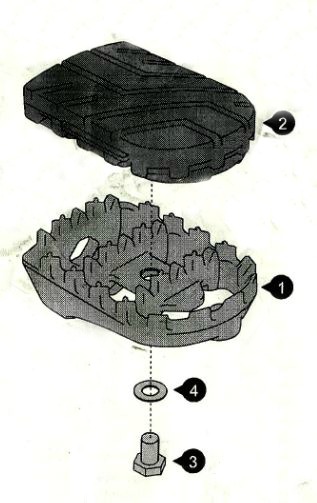
The above picture shows the parts for one side of the bike. The kit comes with: 1- instructions, 2- a hinge adapter, 3- foot peg, 4- a couple of small bags of hardware, 5- a rubber pad that mounts on the foot peg. If you have trouble reading German or English, the pictures will get you through the installation without any problems.
The hinge adapter (left side of picture) attaches to the foot peg with a single bolt and washer. As shown below, the peg side has an upper and lower mounting hole to raise or lower the peg on the bike. If later on, you wish to switch the position, the peg must come off the bike to change it. I used the top hole to lower the peg.
When I installed the mount bolt, I loosely inserted the hinge adapter into the peg and started the bolt. Then, I tightened the bolt with a 13mm wrench which drew the hinge adapter into the foot peg. Don't forget to add threadlocker on that bolt!
Next, the rubber foot pad mounts on the peg with a single bolt and washer. The pad can be removed and re-installed when switching from highway to off road riding, but on a KLR every bolt needs threadlocking compound!
The above picture shows the assembled peg ready to go on the bike. The pegs are interchangeable, but the hinge adapter is left side and right side specific, so watch for that.
In your excitement to install the new pegs on the bike, don't forget to add the hinge spring before inserting the mount pin through the bracket. I used channel-lock pliers to compress the spring and it went in without any difficulty.
The new pegs look good and feel very solid on the bike. I am also happy with their increased width when standing on the pegs. I am confident these pegs are the solution to increasing control of the bike in wet and muddy off road riding conditions. Once I get these pegs wet and muddy, I will let you know how I like them.
Lastly, here is a side-by-side view of the SW-Motechs and the stock pegs. If you are thinking of upgrading your KlR foot pegs, the SW-Motechs are an option you may wish to consider.